Winter is all about staying warm, enjoying the fresh snow, and layering-up on those jackets and sweaters!
But before you cozy up by the fire with some hot chocolate, it’s important to do some pre-winter maintenance to make sure your home in optimum shape for the cold months.
Not only can this maintenance help you save money on your energy bill, but it can also help you prevent long-term seasonal damage to your home.
Not sure where to start?
From updating your installation to inspecting the furnace, we’re covering how to winterize your home in 10 easy steps:
Winterize Your Home Step #1: Get an Energy Audit
If you’re just getting started with winterizing your home, a great first step is to get an energy audit.
An energy audit will give you insight into your home’s energy use and can help you reduce energy consumption and save on energy bills.
Starting with an energy audit is a great idea because it can help you identify problem areas in your home (aka opportunities to improve your home’s energy efficiency).

We recommend asking your local utility company if it offers free home energy audits (they often do). An inspector will come by and check your heating system as well as leaks, gaps, pipes, and other inefficiencies.
You can also hire a third-party auditor for a more extensive energy audit that includes diagnostic testing and specific recommendations, though you’ll have to pay a fee.
While you can schedule an energy audit at any time of the year, it’s a good idea to wrap it in to your winterization plan so that you know you’re not wasting any effort or money.
Winterize Your Home Step #2: Improve Your Insulation
Did you know that the insulation in your home can deteriorate over time?
It probably isn’t something that’s crossed your mind, but it’s an important thing to keep an eye on before the cold weather rolls in.
At a minimum, your insulation should be 12 inches thick. If you notice that your insulation has deteriorated overtime (look for signs of water damage, mold, dirt, and grime), or you want to add more insulation, the best places to add insulation are crawlspaces and attics.

For those with unfinished basements, it’s also helpful to insulate the area between the ceiling and living room.
Keep in mind that when working with new insulation, make sure to remove any paper-backing. It can act as a vapor barrier and can cause problems down that road.
Winterize Your Home Step #3: Inspect Your Furnace & Heating Ducts
One of the most important steps when winterizing your home is making sure your furnace is up-to-speed and your heating properly sealed and insulated.
Before you turn your furnace on for the season, schedule an appointment with an HVAC professional. They’ll make sure that your furnace is running safely and efficiently by checking for carbon monoxide, cleaning the motor and fan, and inspecting the gas piping.

While the HVAC professional is tuning up your furnace, ask them to change your air filters and inspect the heating ducts. According to a recent study, 60% of heated air escapes from ducts before it makes its way to the vents.
This will help your furnace run more efficiently and can help you save a ton of energy and money. In fact, according to Planet Green, a new filter can save you 5 to 15% on your heating bill!
Winterize Your Home Step #4: Lower Your Programmable Thermostat
If you have one of the newer programmatic thermostats, you can program it to learn your family’s heating and cooling habits and even keep the house cooler when it detects that no one’s home.
Something as simple modernizing your thermostat can make a big impact on your energy usage.
In fact, for every 1°C (34°F) you lower your thermostat at night or while you’re away – for a minimum of eight hours – you can actually save up to 2% on your heating bill!

If you’re happy with your current thermostat, you can also do this manually. For example, when you’re going to bed or leaving your home for an extended period, set your thermostat to 3°C lower than how you normally keep it.
You can also install one or more Notion temperature sensors in your home! You’ll get an alert to your smartphone when a room exceeds or drops below the temperatures you have defined in the Notion app – so it’s a great way to keep tabs on your energy consumption.
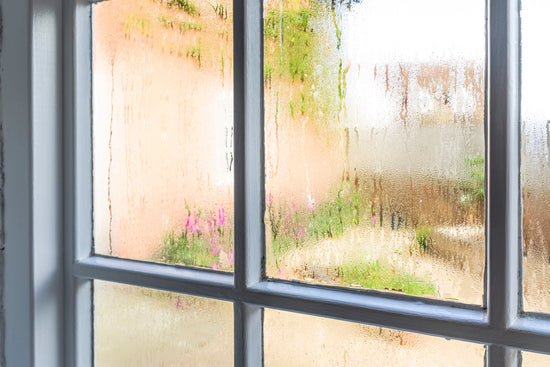
Winterize Your Home Step #5: Check the Exterior, Doors, and Windows
Did you know that installing storm doors and windows can increase the energy efficiency in your home by 45%?
Given the long winters in parts of America, homeowners can benefit immensely from installing storm doors – and it’s actually really easy to do yourself. All you need to do is attach them to the door frame outside of your regular doors and windows.
Pro tip: The American Recovery and Reinvestment Act actually provides tax credits for 30% of the total cost of energy-efficient storm doors. This can help offset the costs of purchasing storm doors for your home.
Sounds like an easy win right?

As for windows, it’s best to have double or even triple-pane windows. Make sure to replace any cracked glass in windows – even the smallest cracks can let significant air in.
#6: Replace Weatherstripping
This one should be a no-brainer! The cost of weatherstripping is around $5-8, but it can save you hundreds of dollars on your energy bills.
Air leakage can be difficult to locate, so make sure to check around light switches, electrical outlets, and even interior doors and windows.

A useful trick is to hold a tissue over a light switch or along the crack of a door. If flutters, it could mean that air is getting in and weatherstripping or caulking needs to be applied.
Another trick is to turn the lights off in your home and inspect the edges of your doors and windows. If you notice any light entering through small cracks, you may need to add some caulking to close it.
#7: Drain and Wrap Your Pipes
You can prevent your pipes from freezing or bursting in the winter by taking a few precautionary steps.
First off, it’s important to drain any air conditioners or pipes that lead to outdoor water faucets. This includes garden hoses and any irrigation systems that you might have.

If you have any unheated spaces in your home, including a crawl space or garage, it’s also best to wrap the pipes in the areas with insulation (such as lagging, a foam material that insulates and reinforces them, or heat tape). This can help prevent water damage from unheated pipes from freezing and bursting in the winter.
While this can be tedious, it’s absolutely worth it in the long run!
#8: Inspect Roof, Gutters, and Downspouts
With the cold temperatures rolling in, it’s important to inspect your roof and clean your gutters to avoid any leaks or floods.
When checking your roof, make sure to replace worn or damaged roof shingles or tiles. This can help prevent any future long-term damage to your roof.

While you have the ladder out, you’ll also want to clean out the gutters and downspouts to clear away any debris. Keep in mind, that this should definitely be done before the leaves freeze and downspouts freeze.
To avoid any future blockage, it could be also useful to install lead guards on the gutters or downspouts to direct any water away from the home.
Lastly, no one wants to deal with flood damage! So if you’re home is prone to leaks or backed up gutters, install a Notion sensor so that you can be notified the second your home experiences a leak.
#9: Get the Fireplace and Chimney Inspected
Making sure your fireplace and chimney are clean and in working order is important for a few reasons: it can help improve their efficiency and keep your family safe from potential fires.
During the winter (aka the fireplace-using months), fireplaces are one of the biggest causes of home fires, so it’s really important to get them inspected and cleaned before you start roasting any chestnuts!

It’s also common for animals to build nests in chimneys – especially in the winter. So make sure to cap or screen the top of the chimney. This will keep out unwanted birds and rodents.
If your chimney hasn’t been cleaned since last year, it best to hire a professional chimney sweep to check the structure of the flute and remove any soot.
Remember that chimney cleaners are busy in the months leading up to winter, so schedule your appointment as soon as possible!
#10: Service Weather-Specific Equipment
It’s time to tune up those snow blowers and get them ready for winter!
The last thing you want after a big snowstorm is to find out that your snow blower’s motor has burned out and you have to manually shovel your driveway.
This can easily be avoided by servicing your winter equipment ahead of time.

When servicing your equipment, make sure to check the status of any other winter tools, including worn rakes, snow shovels, and ice choppers. This is also a great opportunity to stock up on bags of ice-melt or sand to help keep your driveway and sidewalks safe.
Pro tip: If you’re in the market for a new shovel, we recommend buying one with ergonomic design – it will save your back and make the job a lot easier!
And that’s a wrap! Let us know what you think of our winterization tips and if there are any that we missed!